(If your projector core has 4 threaded holes and your mount does not have hooks, see the G4 R1 mount guide)
What’s Included
Camera Mount (With rear leg attached in parked position for shipping)
Built in power extension tap. To accommodate powering projector and camera AC adapter.Lens hood (attaches to projector to combat dust / light infiltration)
Zip ties to attach your camera power supply
Hardware (1x Screw with washer and spacer)
Installation tool (3/16 allen key)
Installation
As of 2021, the black nylon spacer show in the video is no longer included / required.
First attach a carousel tray to the projector and lock it in place my pressing the select switch and rotating to any value but 0. This will keep the projector stable when we flip it upside down.
Flip your projector core upside down.
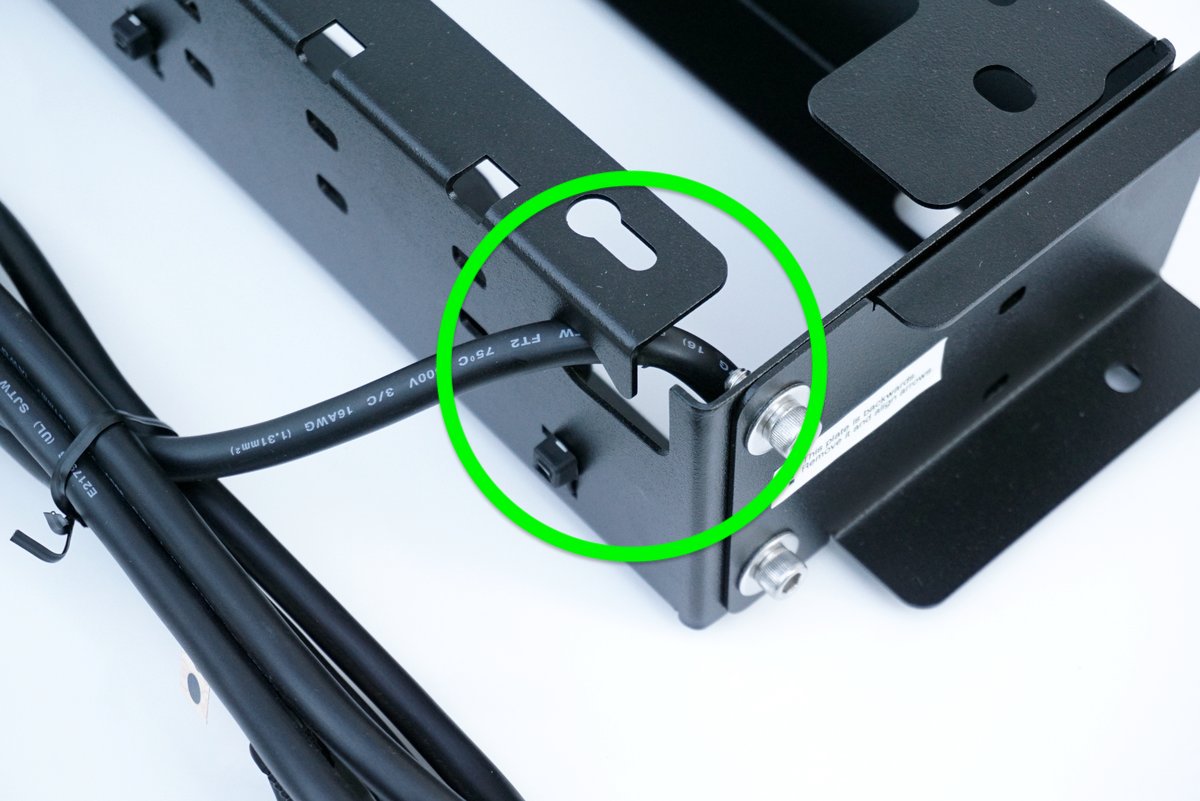
Free the projector’s power cable. Route it through the cutout in the mount and plug it into one of the available outlets. Attach the mount to the projector in the orientation shown. There are two hooks on the mount which will will go into the appropriate holes in the projector.
Slide the mount over to make sure the hooks are biting into the projector well before installing the screw in the next step!
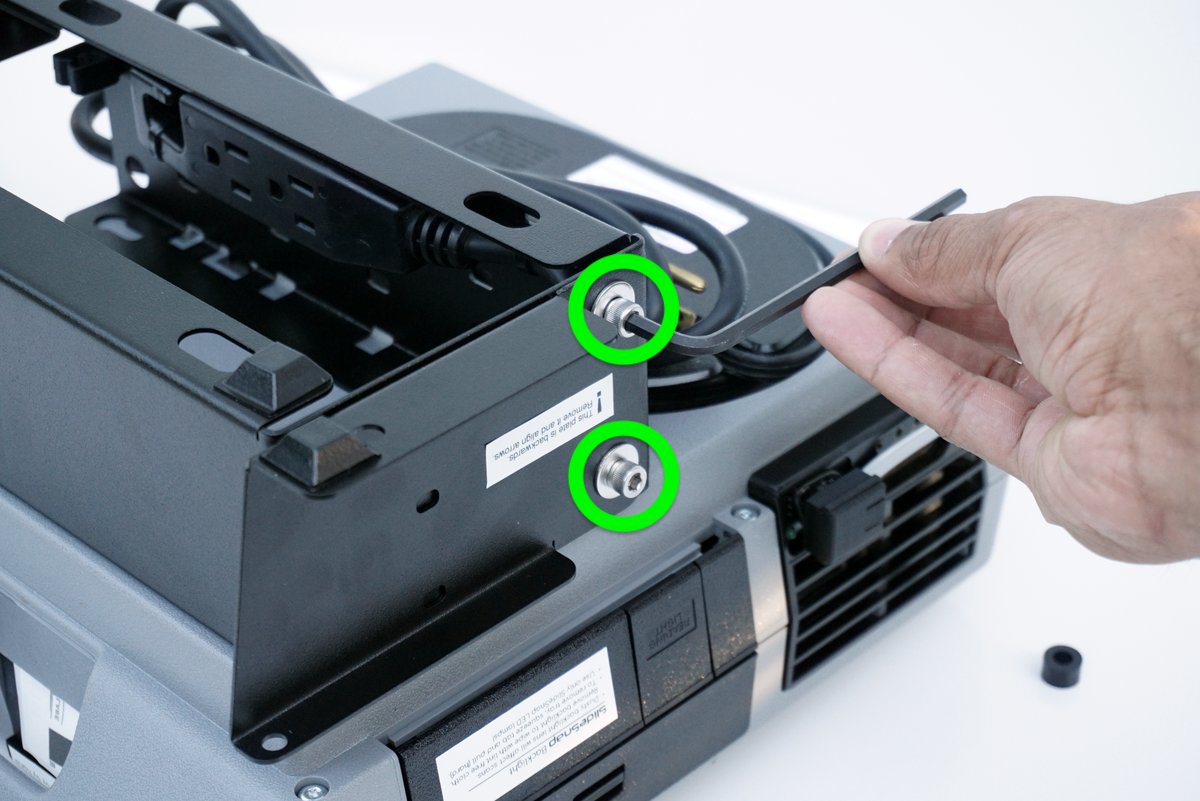
Install the screw and washer with the supplied tool.
Re-orient the rear foot to the proper position by removing the pictured screws.
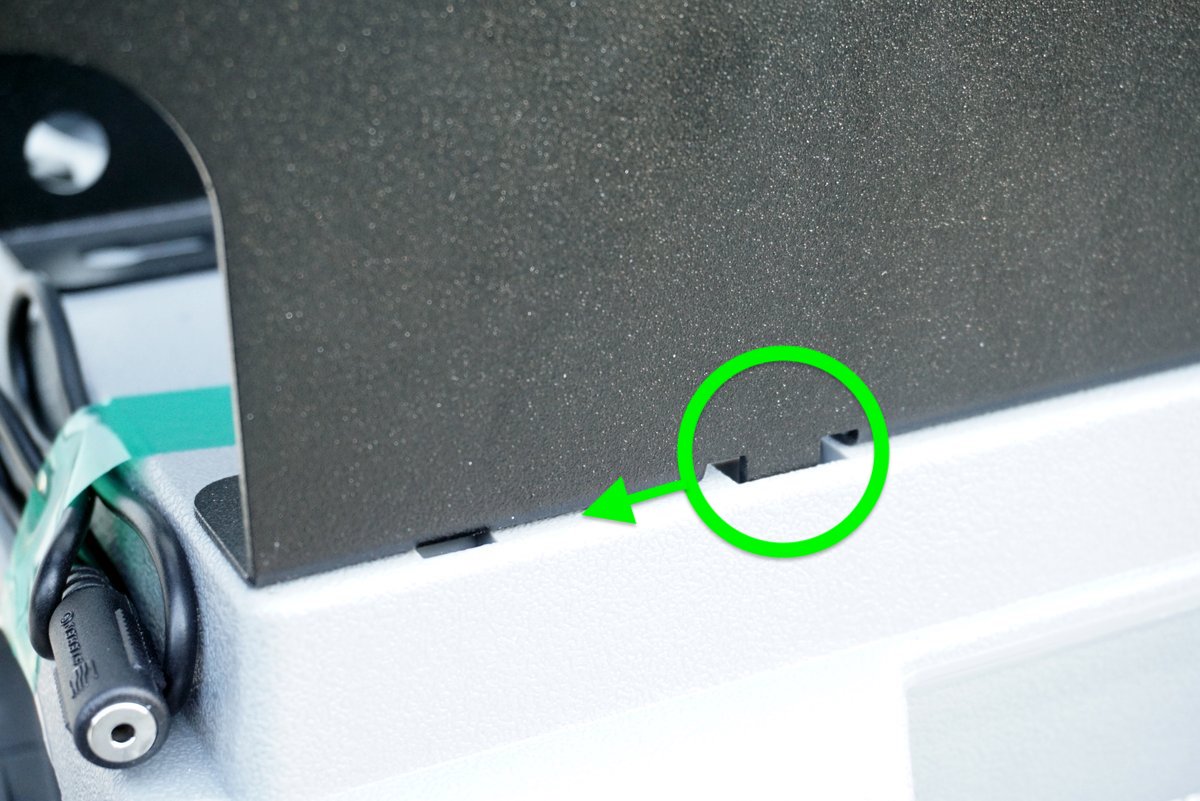
Route the trigger cable extension through the mount and into the cable clips as pictured.
Ensure the power switch is on!
Install Camera Power Supply (optional)
If you are using a power supply for your camera instead of a battery. Plug it into the extension cable as well.
Attach the power supply using the included zip ties and any of the available tie-down holes on the mount. Route the camera end up towards the camera using the cable clips.
This picture shows the routing of the cables but does not show the new cable clips you will use.
In order to attach your camera, first remove the top plate by loosening the clamp it is attached to.
Attach the plate to your camera. Take care that it is straight and not blocking the battery door if possible. Only loosely hand tighten. This way you will be able to rotate the camera by nudging it when mounted.
Attach camera with plate to the clamp. You will loosen, then slide the plate along this clamp to achieve left and right framing adjustment.
If you need to lower / raise your camera beyond the range of the leveling platform (RARE: typically only for very large cameras), loosen the four screws on the sides of the main platform. Set to desired height and retighten screws.
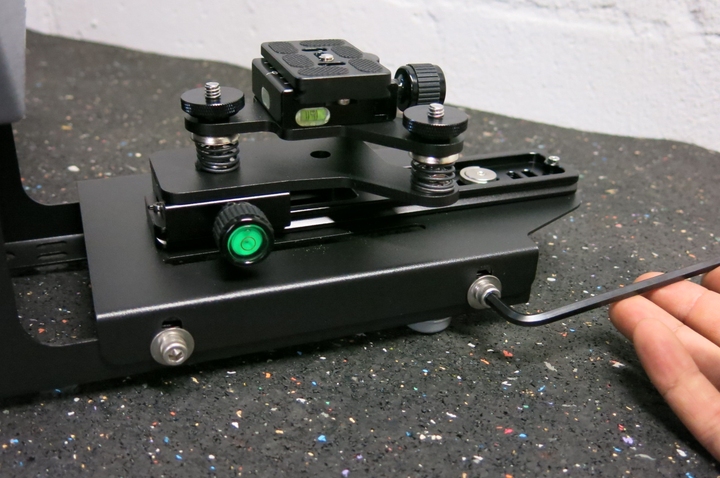
The bottom clamp can be loosened to bring the camera further from or closer to the projector. An additional turn will loosen the clamp enough to remove the leveling platform if needed.
Should you need to back your camera up even further (for larger slides perhaps) the rail position can be adjusted by loosening the wing nuts underneath.Here the bottom rail is shown in its farthest position.